
There are different types of nail art and nail art techniques on the market nowadays.
Some, can be achieved by hand, hand painted (3D, watercolour, one stroke, freehand painting just to mention some) with lots of practice and patience. Some others can be achieved with a sticker or a decal. In nail art, there is no right or wrong thing to do until your clients are happy. A great example: stamping. When I first did stamping, it was about 20-25 years ago when I was still in school. My mum bought my very first stamping kit to me. Then after becoming a nail tech, I started to attend more and more nail art courses because I wanted to be the very best I could. Spent lots of time and money on different brushes, products. You name it! Then about 2 years ago, I was introduced to stamping again. I was a bit disappointed. Why? Because i spent so much time and effort to learn hand painted techniques and here comes stamping. I felt it was a cheat on nail art. But I had to realise my clients are very, very happy with their stamped nails. They think it was amazing! Why did I tell you this story? Because I want you to know, it does not really matter what do you do under the name of nail art, until your clients are happy with it.
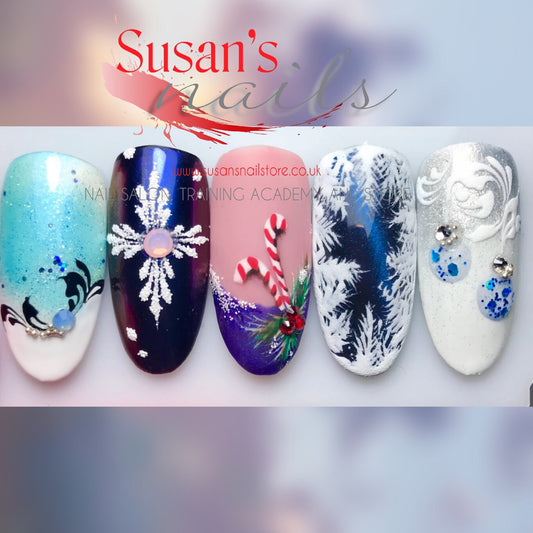
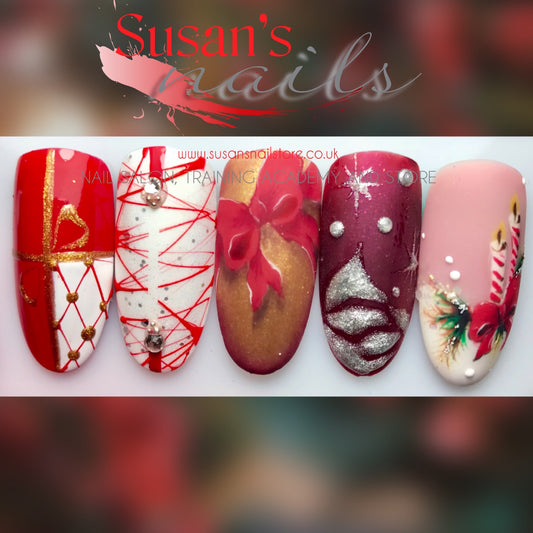
I have got the same feelings about water decals too. Using decals on their own is not my cup of tea but if you add some personality to it, make it look like a bit more than just an ordinary water decal then we can talk about it.
Most of the water decals come with an instruction at the back of the package. They are more or less ok to follow. However, different decals work a bit differently. You can use them with nail varnish, gel polish, hard gel or acrylics too. If you decide to use with hard gel and acrylics my recommendation is, try not to encapsulate it into the nail. It will be protected with a big bead of gel or acrylics so it will never gonna come out of the nail. Guaranteed! However as it will sit far too down (close to the natural nail) the design will have a sort of aquarium effect. Not clear design or lines. Personally I do not like that. And when the client comes back for an infill, you will need to file a lot to get rid of your sticker.
If I were you, I would try to use them on the top, after colour application, before top coat. In this case, easy to file it out next time.
Some decals are thicker, some decals are thinner. When you are encapsulating, it doesn’t matter of course. But when you are doing it on the top of the nail, then you are better off having a nice thin one.
So here is a quick step by step on how to use them.
- Decide which design you want on the nail.
- Carefully cut it out with a sharp scissors.

- Some of the decals have got a clear protective layer on the top of the design. Make sure you take it off before you put the decal into the water. If you miss this step, the protective layer will stick to the design and you will not be able to get rid of it again. Plus it makes the decal really hard and almost impossible to put it on the nail.

- Put the decal into water for a couple of seconds. Cold water works fine. (There are some decals only work with hot water.)

- Now you can separate the design from the white paper easily.

- It is ready to apply on the top of the nail. There are several ways to do the base for the decals.


- Put it on a buffed back surface and wait till the decal dries completely before applying top coat. (see picture below)
- Or create a sticky layer on the top of the nail. You can achieve this sticky layer with a top coat that requires cleanser, or top gel without any tacky layer cured just for a second or two, thin layer of foil glue, or even acid free primer.

- Apply flexible top coat twice.

- If the design requires, you can add some hand painted details to it.

A simple way to amaze your clients!
Lots of Love,
Susan xx
P.S: Did you like this blog post? Do you think your nail tech friend could benefit from this? Why not sharing it!