
Hey my lovely followers 👋,
It has been for a little while since I posted any nail related blog post I know but sometimes life just takes over.
We just got back from a much needed holiday with lots of sunshine, beautiful food and drinks. Battery's recharged, ready to give a push to the last summer month.
I really needed to take a break. Came back more motivated, full with new ideas and I am so happy to share them with you.
First one is this minty salon nail 💅 which has been a great success among my clients. All you need is a bit of minty green, white, black and for the glamorous touch some gold gels.
You will also need some fine nail art brush to do your lines and then you are all set to recreate my design.
This nail art can be done on top of gel polish, BIAB, hard gel, acrygel or acrylics. I would suggest to use a cover pink base rather than a clear one.
Now let's see the steps.
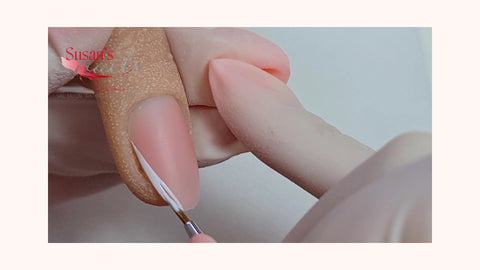
Step 1: matt base
After building and filing the nail surface, I prefer to do art on a matt surface. So I apply a layer of matt top gel on the nail and cure. This works better for me and the brush doesn't slip on the surface of the nail. You could also cleanse the nail and see if that works better for you. Which method do you use?

Step 2: white line
I always mark my starting and finishing point on the nail. You can do this just with a small dot and then with a line connect the dots together. I use a skinny and long nail art brush for this, like Mosaic Fine Detail Brush.

Before you cure your gel, fill in the gap between the line and the side of the nail with white gel. I normally use a shorter and a bit thicker brush for this, like NABA Slim or NABA Top Liner.
Step 3: minty
This is such a cool colour for spring and summer. Add another line above the white using your skinny brush again and cure.

Step 4: a touch of glamour with ... gold
You could use silver or rose gold too. Whatever your clients like but I believe this gold actually in great harmony with minty and white. It is super glamorous too!

Step 5
Now that left side of the nail is ready, let's focus on the right side.
The highest point of my minty line is on the same level as the gold, and the lowest is a bit further down from the middle.

Step 6: add a touch of black
I like using black colour but be careful with it. If your black line is too thick, the nail will not look right. All you will notice is a thick black line.
So try paint a black line half of the thickness of your minty line. I know it is hard ( I don't always get it right for the very first time 😔 ) but practice makes perfect.
I like using Mosaic One Stroke Art gel in BLACK.
Step 7: more black
This is one of those steps you can do or decide to skip. The whole design itself looks great without it as well and I know these animal print looking lines not necessarily every clients cup of tea.

Step 8: use top gel
I prefer to use the ones without any tacky layer but it is your choice. Whatever works for you.

Step 9: finish picture

Now that you have the steps explained, watch me doing it on my YouTube channel.
If you are struggling with
- painting fine lines
- not sure how to choose the perfect brush
- when and how to clean your brush
- what are the best products to use
- how to pick up gel on your brush
I am also sharing my 4 key techniques to quickly improve straight fine lines in the salon.
Sounds good?
Click here to get it.